Addressing the Thermal Problems of the Louqe RAW S1
Introduction
This post is a follow-up to my previous Reddit post: First Impressions of the Louqe RAW S1 - a Mini-Review and Initial Thermal Analysis. The conclusion was that the case suffers from poor thermal design, and while some of it could be mitigated, some of it could not. It’s a real shame, because in it’s class (12L vertical sandwich), it really doesn’t have any competition in the looks department. I like the design language so much, I spent way too much time investigating and fixing the thermal issues so I could use it as my primary desktop without it repeatedly overheating. I hope that the following will help others be able to use this case better as well.
The Problems
There are essentially three issues that cause the RAW S1’s poor thermal performance:
1. Exhaust fan can’t move enough hot air out of the case
Because there is a gap between the fan and the openings on the rear of the shell, a lot of the air moved by the fan ends up spinning back in the case rather than making it out. Fortunately, this can be fairly easily remedied with the gasket mod mentioned in my previous post. Unfortunately, getting the gasket to stick on the fan is not an easy task. The fan just doesn’t have enough surface area around the rim for good adhesion, and in my case, putting the shell on would frequently pull the gasket off. Even if you do the gasket mod, though, there is still significant exhaust airflow restriction due to the stock bracket and placement and orientation of the PSU.
2. CPU heatsink doesn’t have a cool air source.
There’s no intake fan; whatever the exhaust fan pulls in through the openings on the sides is it, and it’s not much. Just like the exhaust fan without a gasket, most CPU coolers will just spin hot air around the inside of the case. The heatsink fan has to do double duty as an intake.
3. GPU also can’t get cool air
It boils down to the same reason as the CPU - no intake, and limited exhaust makes the GPU fans spin hot air around.
The Solutions
As with my last post, the experemints I did and the results I got are not meant to be scientifically rigorous. Different setups and components will almost certainly get different results. Nonetheless, I wanted to record it all here because anyone should be able to use the principles to get much better performance out of their case.
My base test setup is the following, changed as described in each section.
| CPU | Ryzen 7 7700X |
| CPU Cooler | Noctua NH-L12 Ghost Edition + Duct |
| Exhaust Fan | Noctua |
| Mobo | ASRock B650E PG-ITX WIFI Mini |
| GPU | AMD Reference RX 6700XT |
Custom Cables
This generally goes without saying in SFF circles, but custom-length cables are a must in a case like this. Every bit of cable is a bit of airflow restriction, and stock PSU cables are very bulky and way too long. If you can spring for the extra cost, I highly recommend using PTFE- or ETFE-insulated hookup wire. The insulation is much, much thinner, so the cables take up way less space. They’re so narrow, I routed the EPS/EATX12V cable under the motherboard. I used about 30ft of this wire. Because the cables are so much shorter than stock, especially for the GPU, it’s not a problem to drop down to 18AWG for even smaller cable bundles! (I did the math on the wire resistance - it checks out).
With a little practice, it’s not too hard to make custom cables yourself, especialy if you’re not sleeving them (you shouldn’t - waste of space). I recommend the MDPC Crimping Tool, and I used connectors and pins from MainFrame Customs, though pretty much any should do.
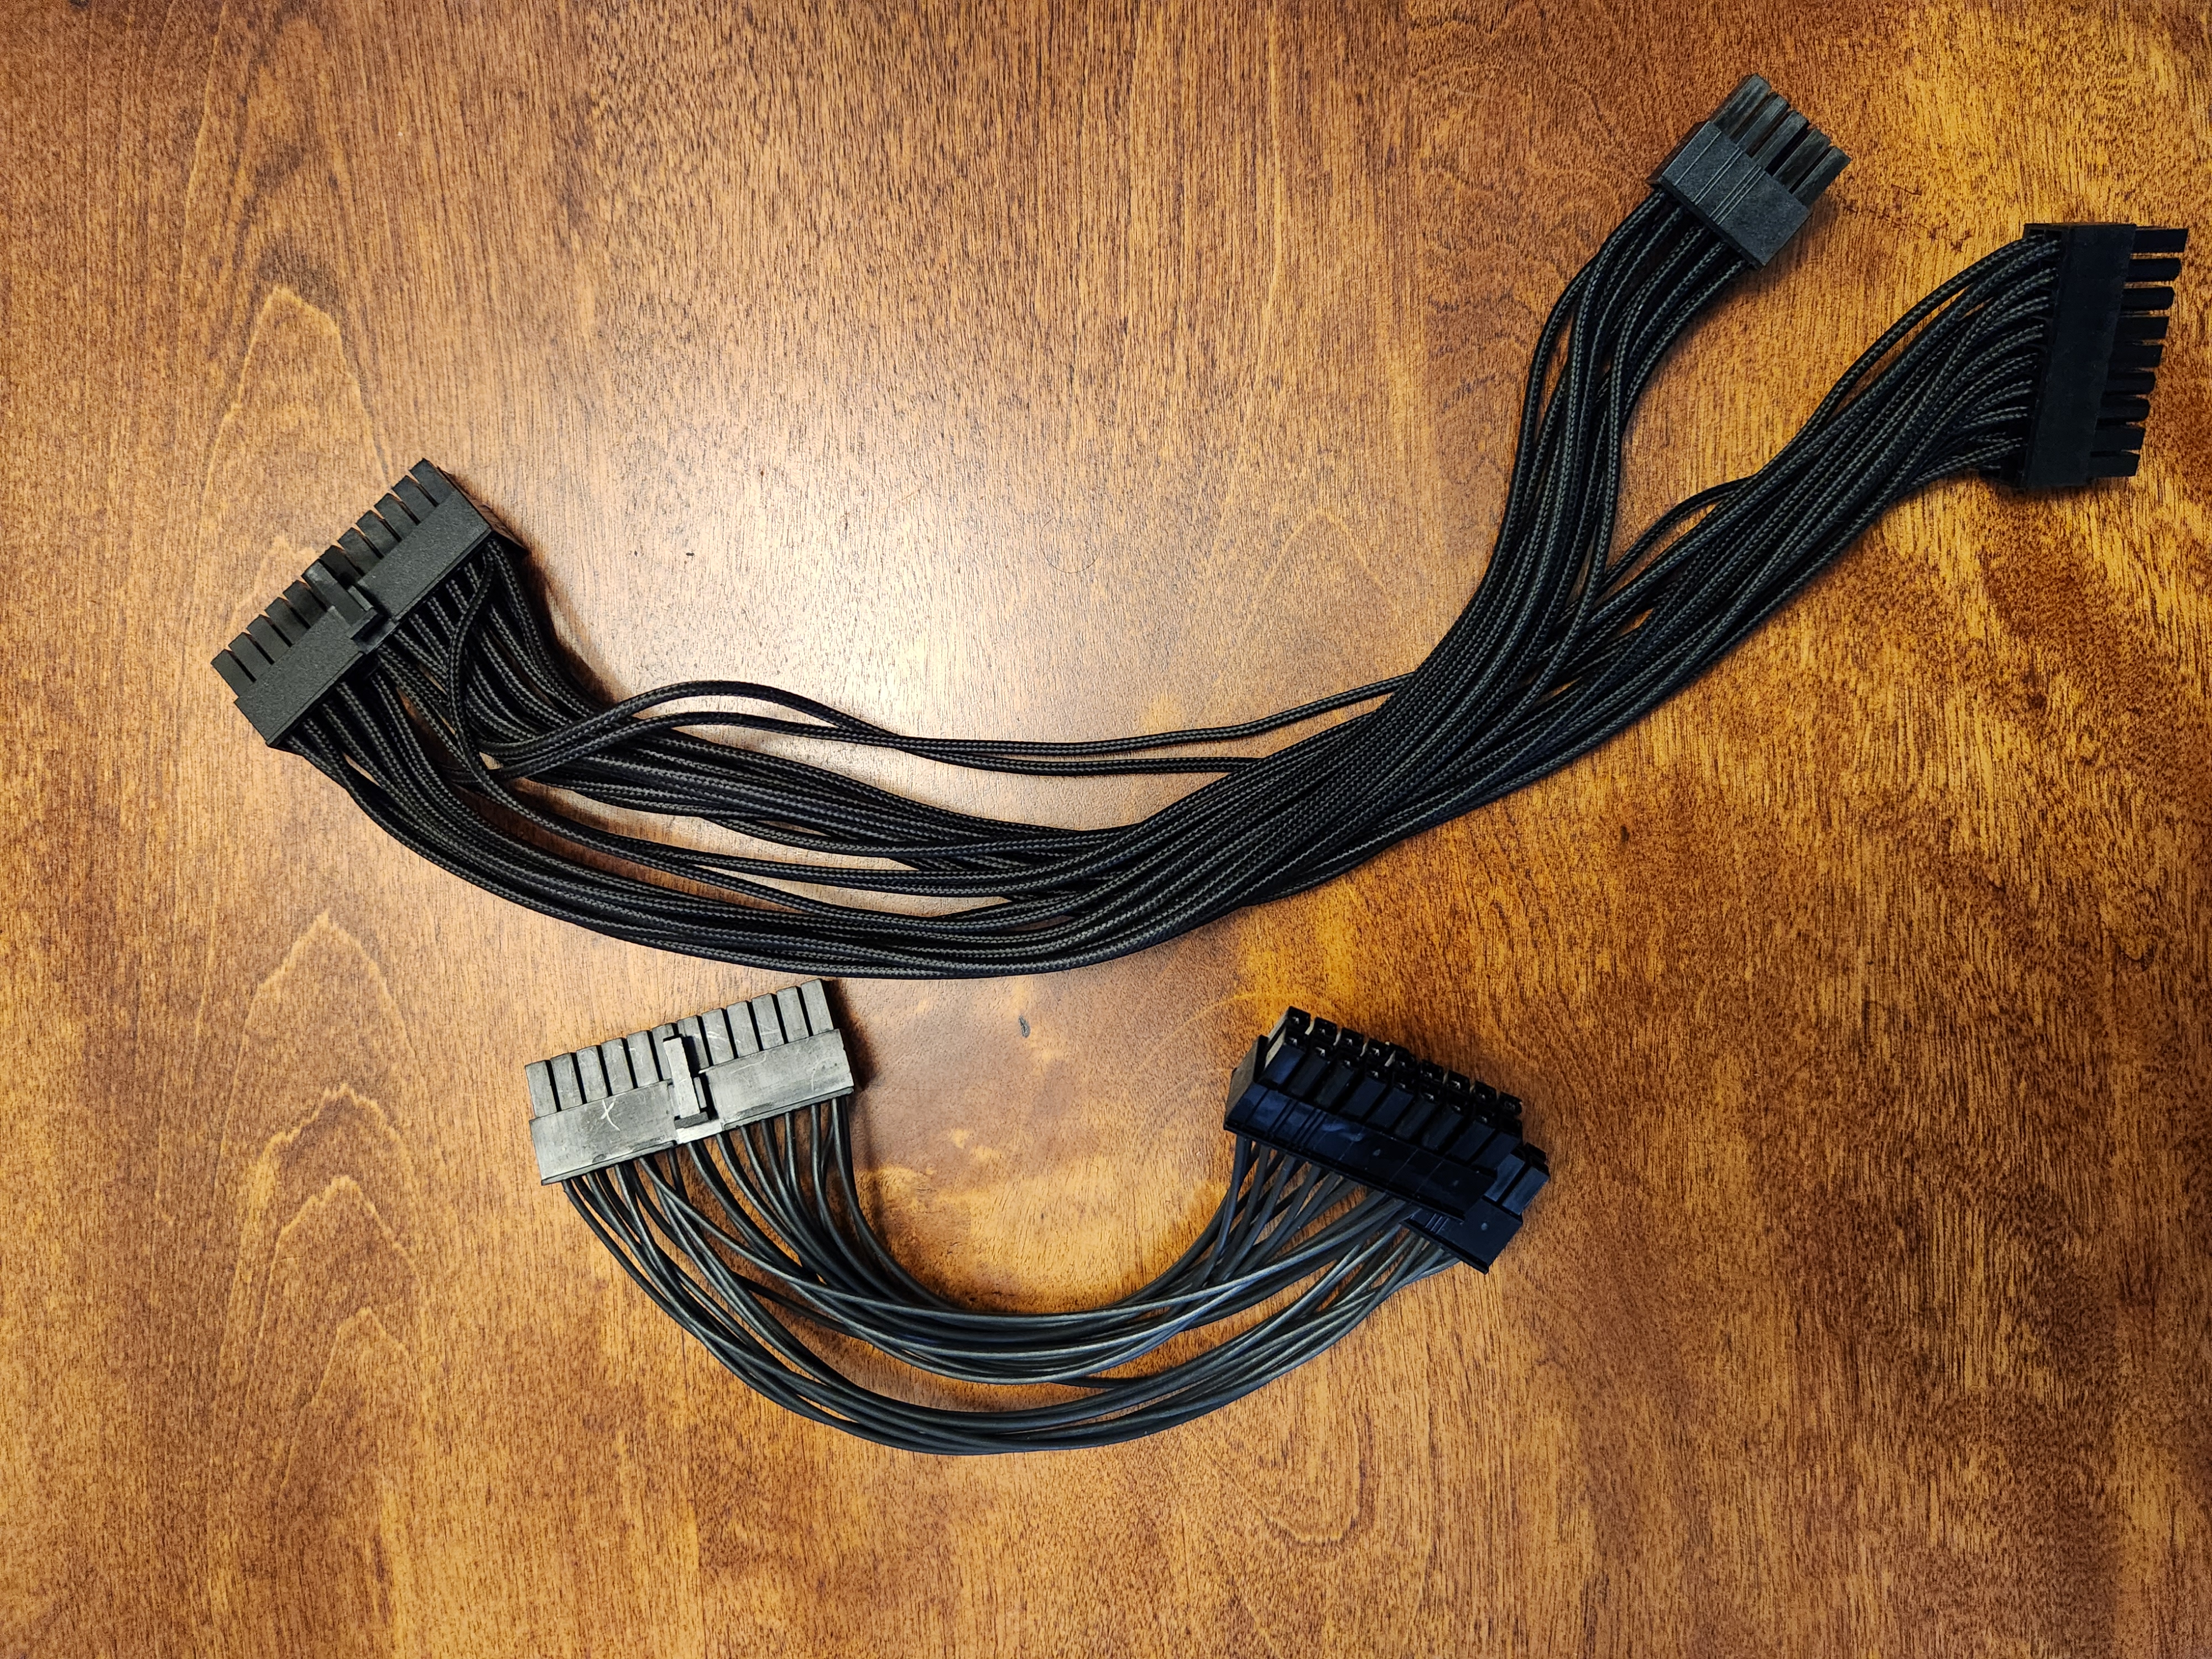
My custom motherboard power cable is way smaller than the stock Corsair!
What Louqe should do for the RAW S2
This might be a stretch, but it would be amazing for the case to come with custom length cables. The PSU and motherboard follow specs, so those dimensions will be consistent across all builds. For the GPU, you could add enough slack to cover the shortest GPU (and longest cables) because it’s not an airflow critical path. Obviously there’s a complication in that different PSU vendors use different connectors, but I’m guessing most people are using Corsair. You also have a massive benefit to economies of scale. A factory cranking out a bunch of these cables with industrial equipment can offer a far better price than people on etsy. I’d be willing to pay a little extra for the case to get thecables too.
New Brackets
I addressed the exhaust airflow problems by redesigning the exhaust fan and PSU brackets, using the existing screws and holes in the spine. The fan brackets are now significantly more open, and the fan attaches on the exterior side. I also designed some gasket pieces that close the gap between the bracket and the shell with plenty of surface area for some 1/16" adhesive foam. Even better, the foam doesn’t have to be stuck to the fan itself! Having the fan mount on the opposite side also makes it possible to use a 15mm fan. A Redditor theorized that this might create better airflow, especially on the GPU side, because the fan has some more room to pull air in. Another Discord user mentioned they used a 15mm fan because they needed extra space for an SSD.
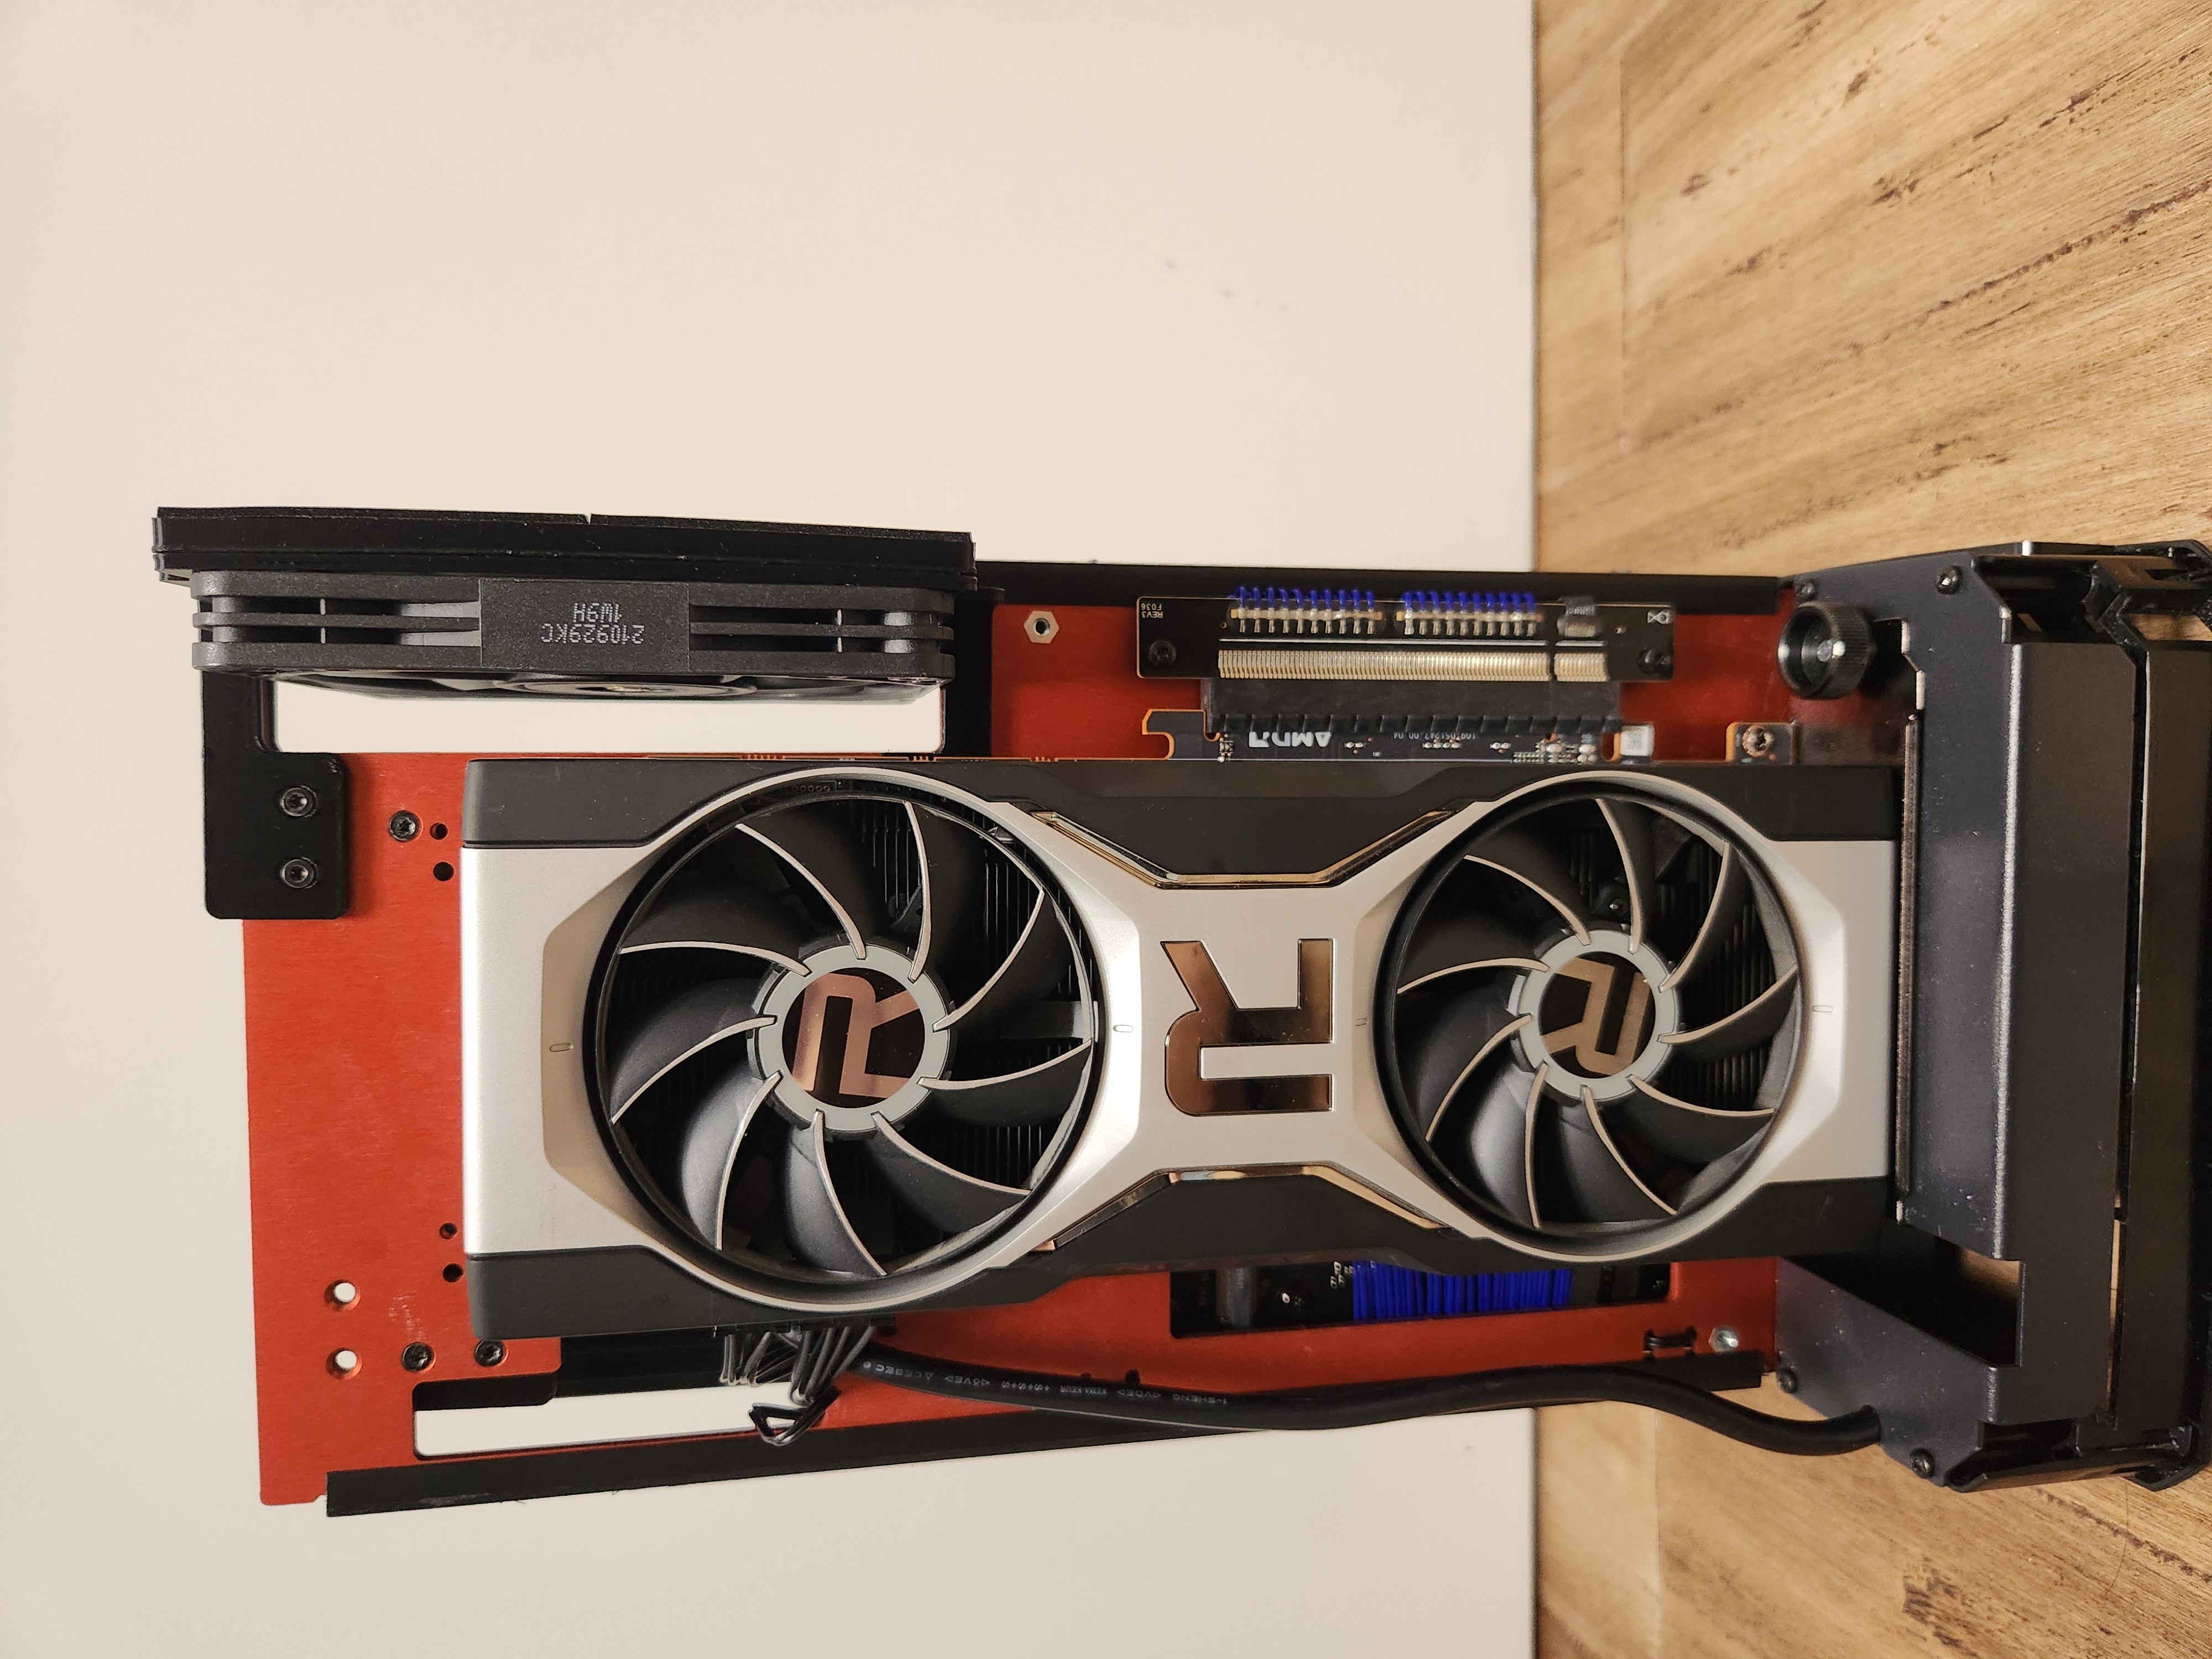
More space between the GPU and a 15mm fan
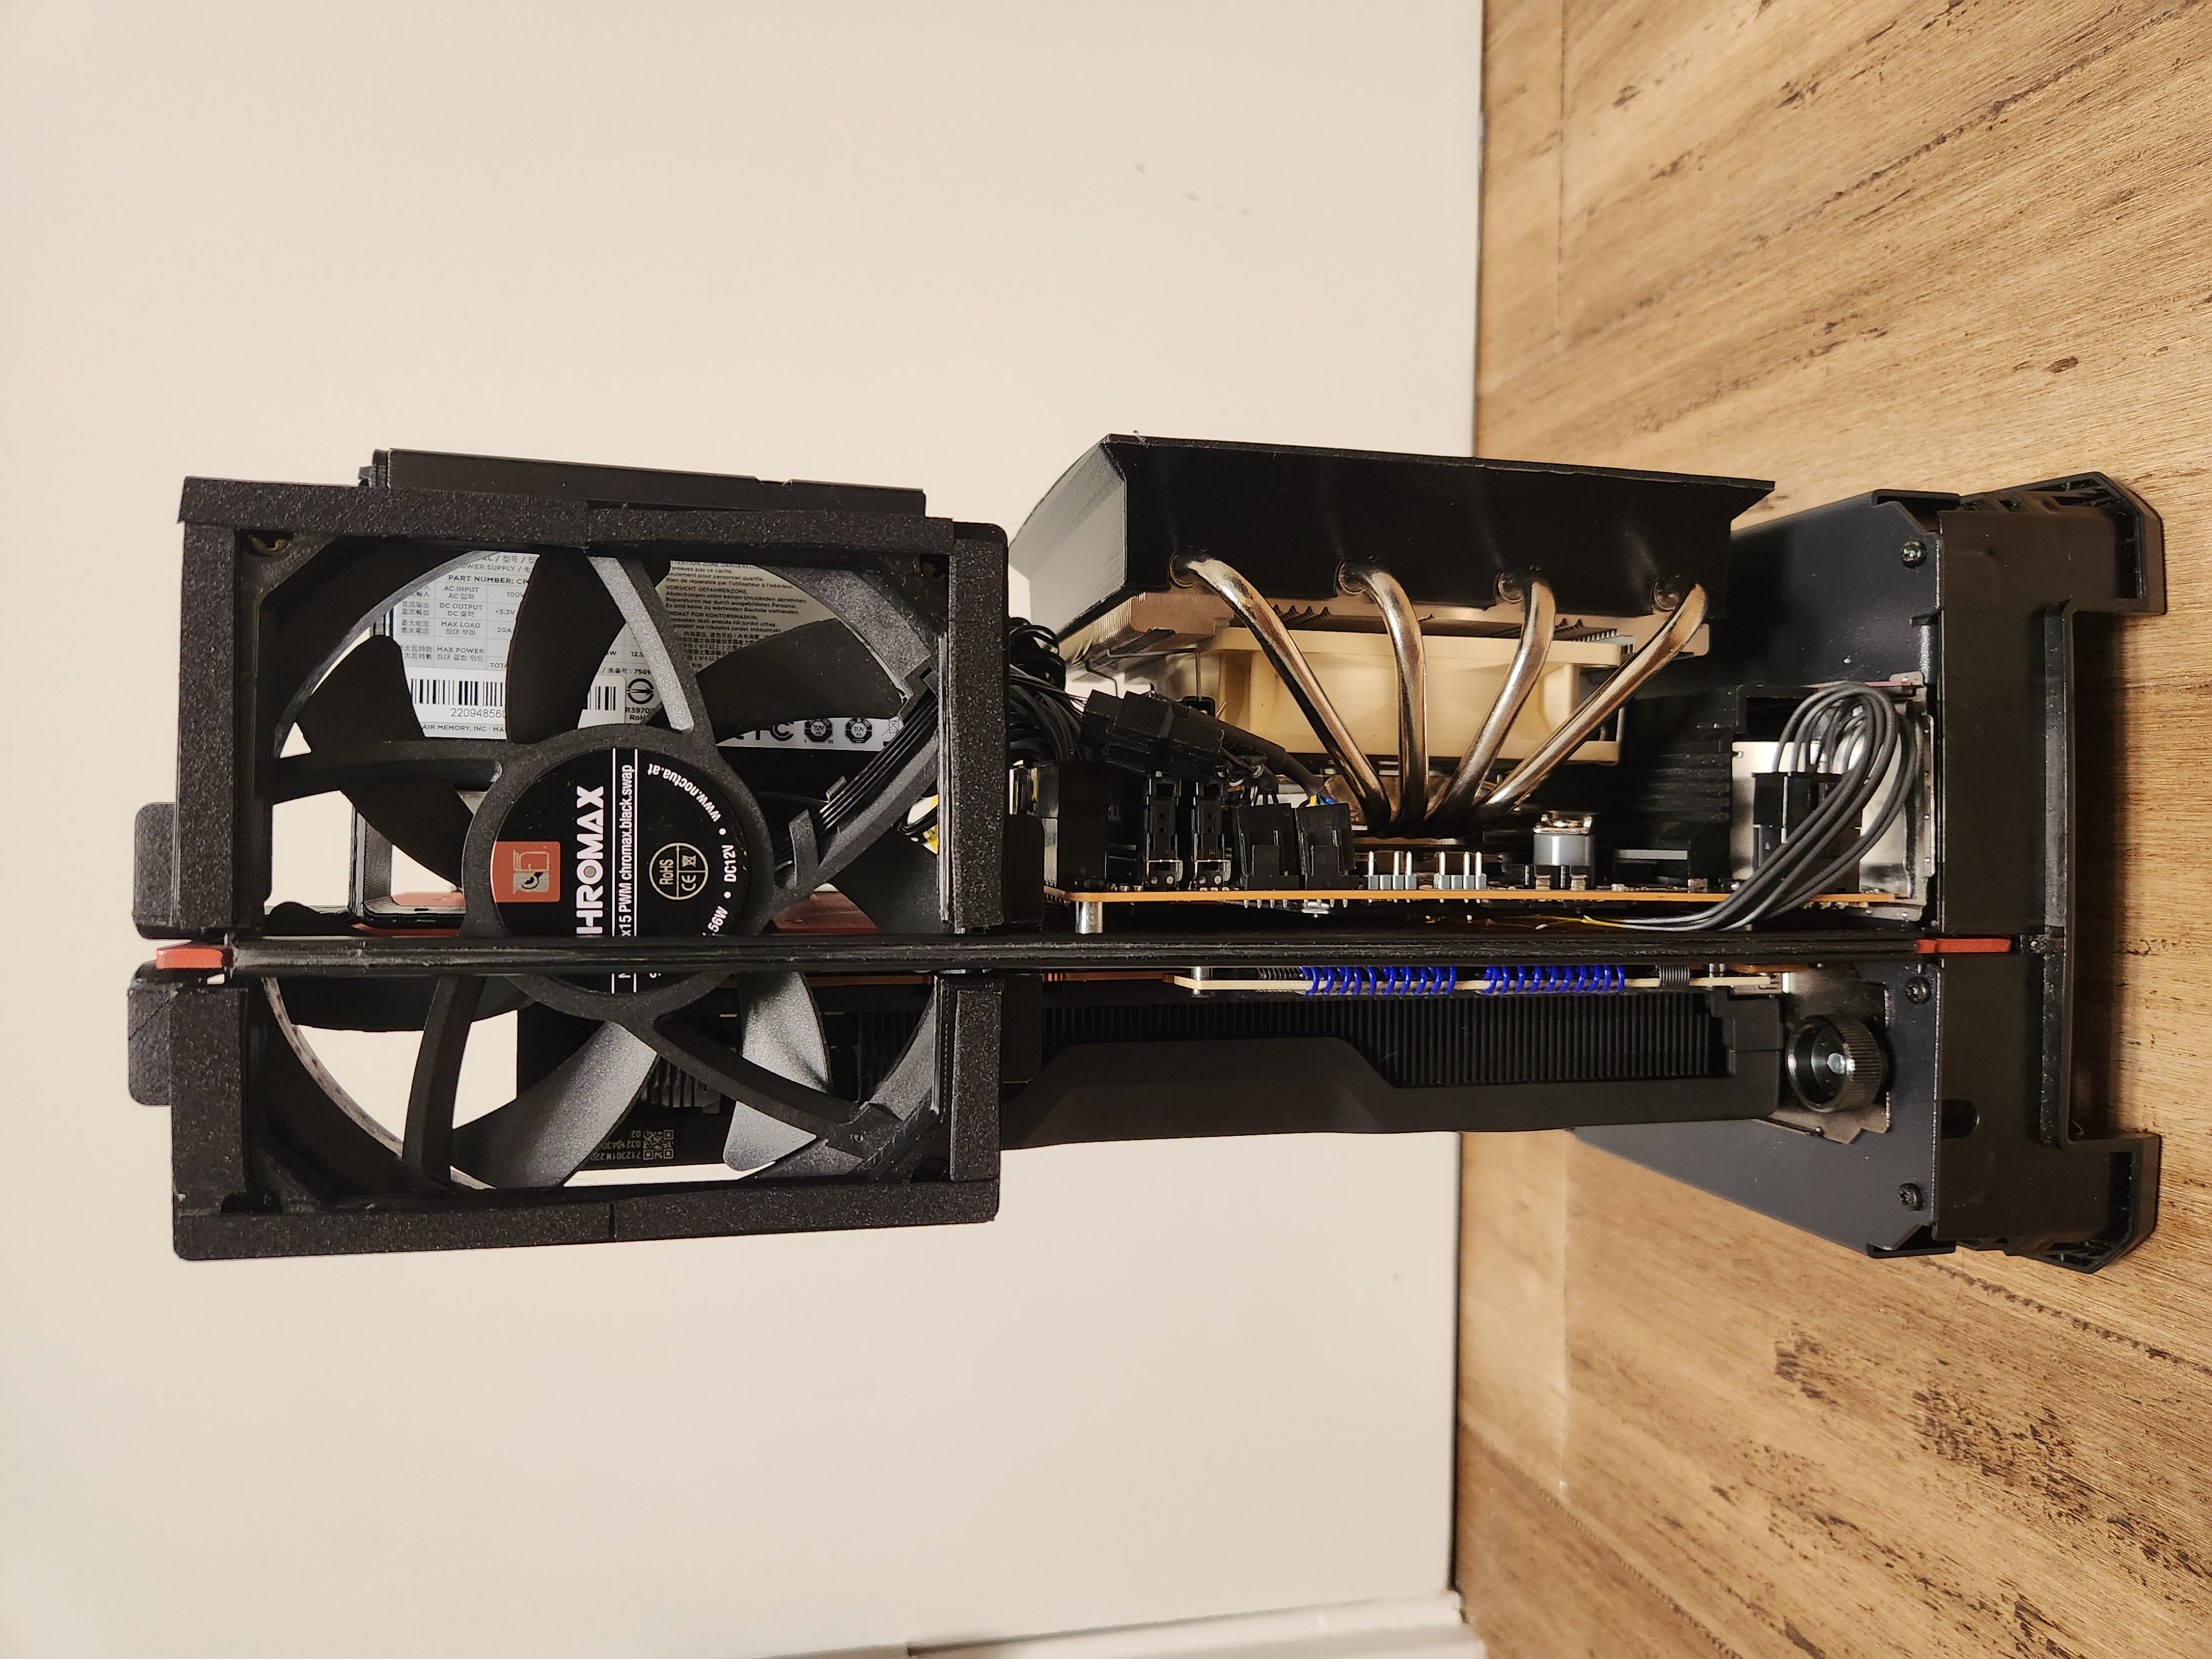
Plenty of exhaust airflow with a much more open bracket (and easy foam application with the gaskets)
I also rotated the PSU and moved it towards the front of the case. Before, the PSU cables were so close to the fan they were almost touching. Despite the PSU being 25mm longer in this orientation, when you add the height of the PSU connectors and the cables, this orientation comes out ahead. It also has the benefit of the PSU exhaust pointing up instead of the front of the case. This makes it much easier for the exhaust fan to move that heat out, insignificant as it may be compared to the GPU. With my thinner custom cables (see below), this results in much better airflow all around.
Bracket that rotates and shifts the PSU
I tested CPU and GPU thermal performance while running Cinebench and Furmark, respectively. I also tested the actual airflow from the exhaust as before. The results are below:
| Fan Size | Fan Speed | Air Flow | CPU Clock | CPU Power | Cinebench Score | GPU Temperature |
|---|---|---|---|---|---|---|
| 15mm | 50% | 10 CFM | 4.60 GHz | 83 W | 17512 | 89 |
| 15mm | 100% | 20 CFM | 4.93 GHz | 99 W | 18686 | 88 |
| 25mm | 50% | 11.1 CFM | 4.82 GHz | 92 W | 18085 | 88 |
| 25mm | 100% | 23.2 CFM | 4.97 GHz | 102 W | 18631 | 87 |
Notes:
- Fan speed reported is both for the CPU cooler fan and the exhaust fan
- Custom cables were used for these tests
- CPU Temperature is pegged at 95C for all tests because of the Zen 4 thermal control
How does this compare to before?
| Fan Speed | Air Flow | |
|---|---|---|
| Old | 50% | 4 CFM |
| New | 50% | 11.1 CFM |
| Old | 100% | 19 CFM |
| New | 100% | 23.2 CFM |
That’s a whopping 277.5% increase in air flow at low fan speeds, and 22% at 100%. My theory is that at the higher fan speed, there is more static pressure to overcome the airflow restrictions, hence the smaller difference. But it’s really unbearably loud, so I still count this as a huge win.
It’s worth pointing out that the 25mm fan was better for both CPU and GPU temperatures, and that the GPU temperatures are still awful even despite this massive airflow improvement!
The STL’s for these brackets are available on Thingiverse. The next step is to have them made in powder coated steel!
What Louqe should do for the RAW S2
Update the bracket design like so to rotate the PSU, move it further away from the exhaust fan, and open up the fan airflow. They should also include the necessary pieces to seal the gap between exhaust fan and shell. Customers shouldn’t have to pay for a gasket for a premium case like this to be functional.
CPU Coolers
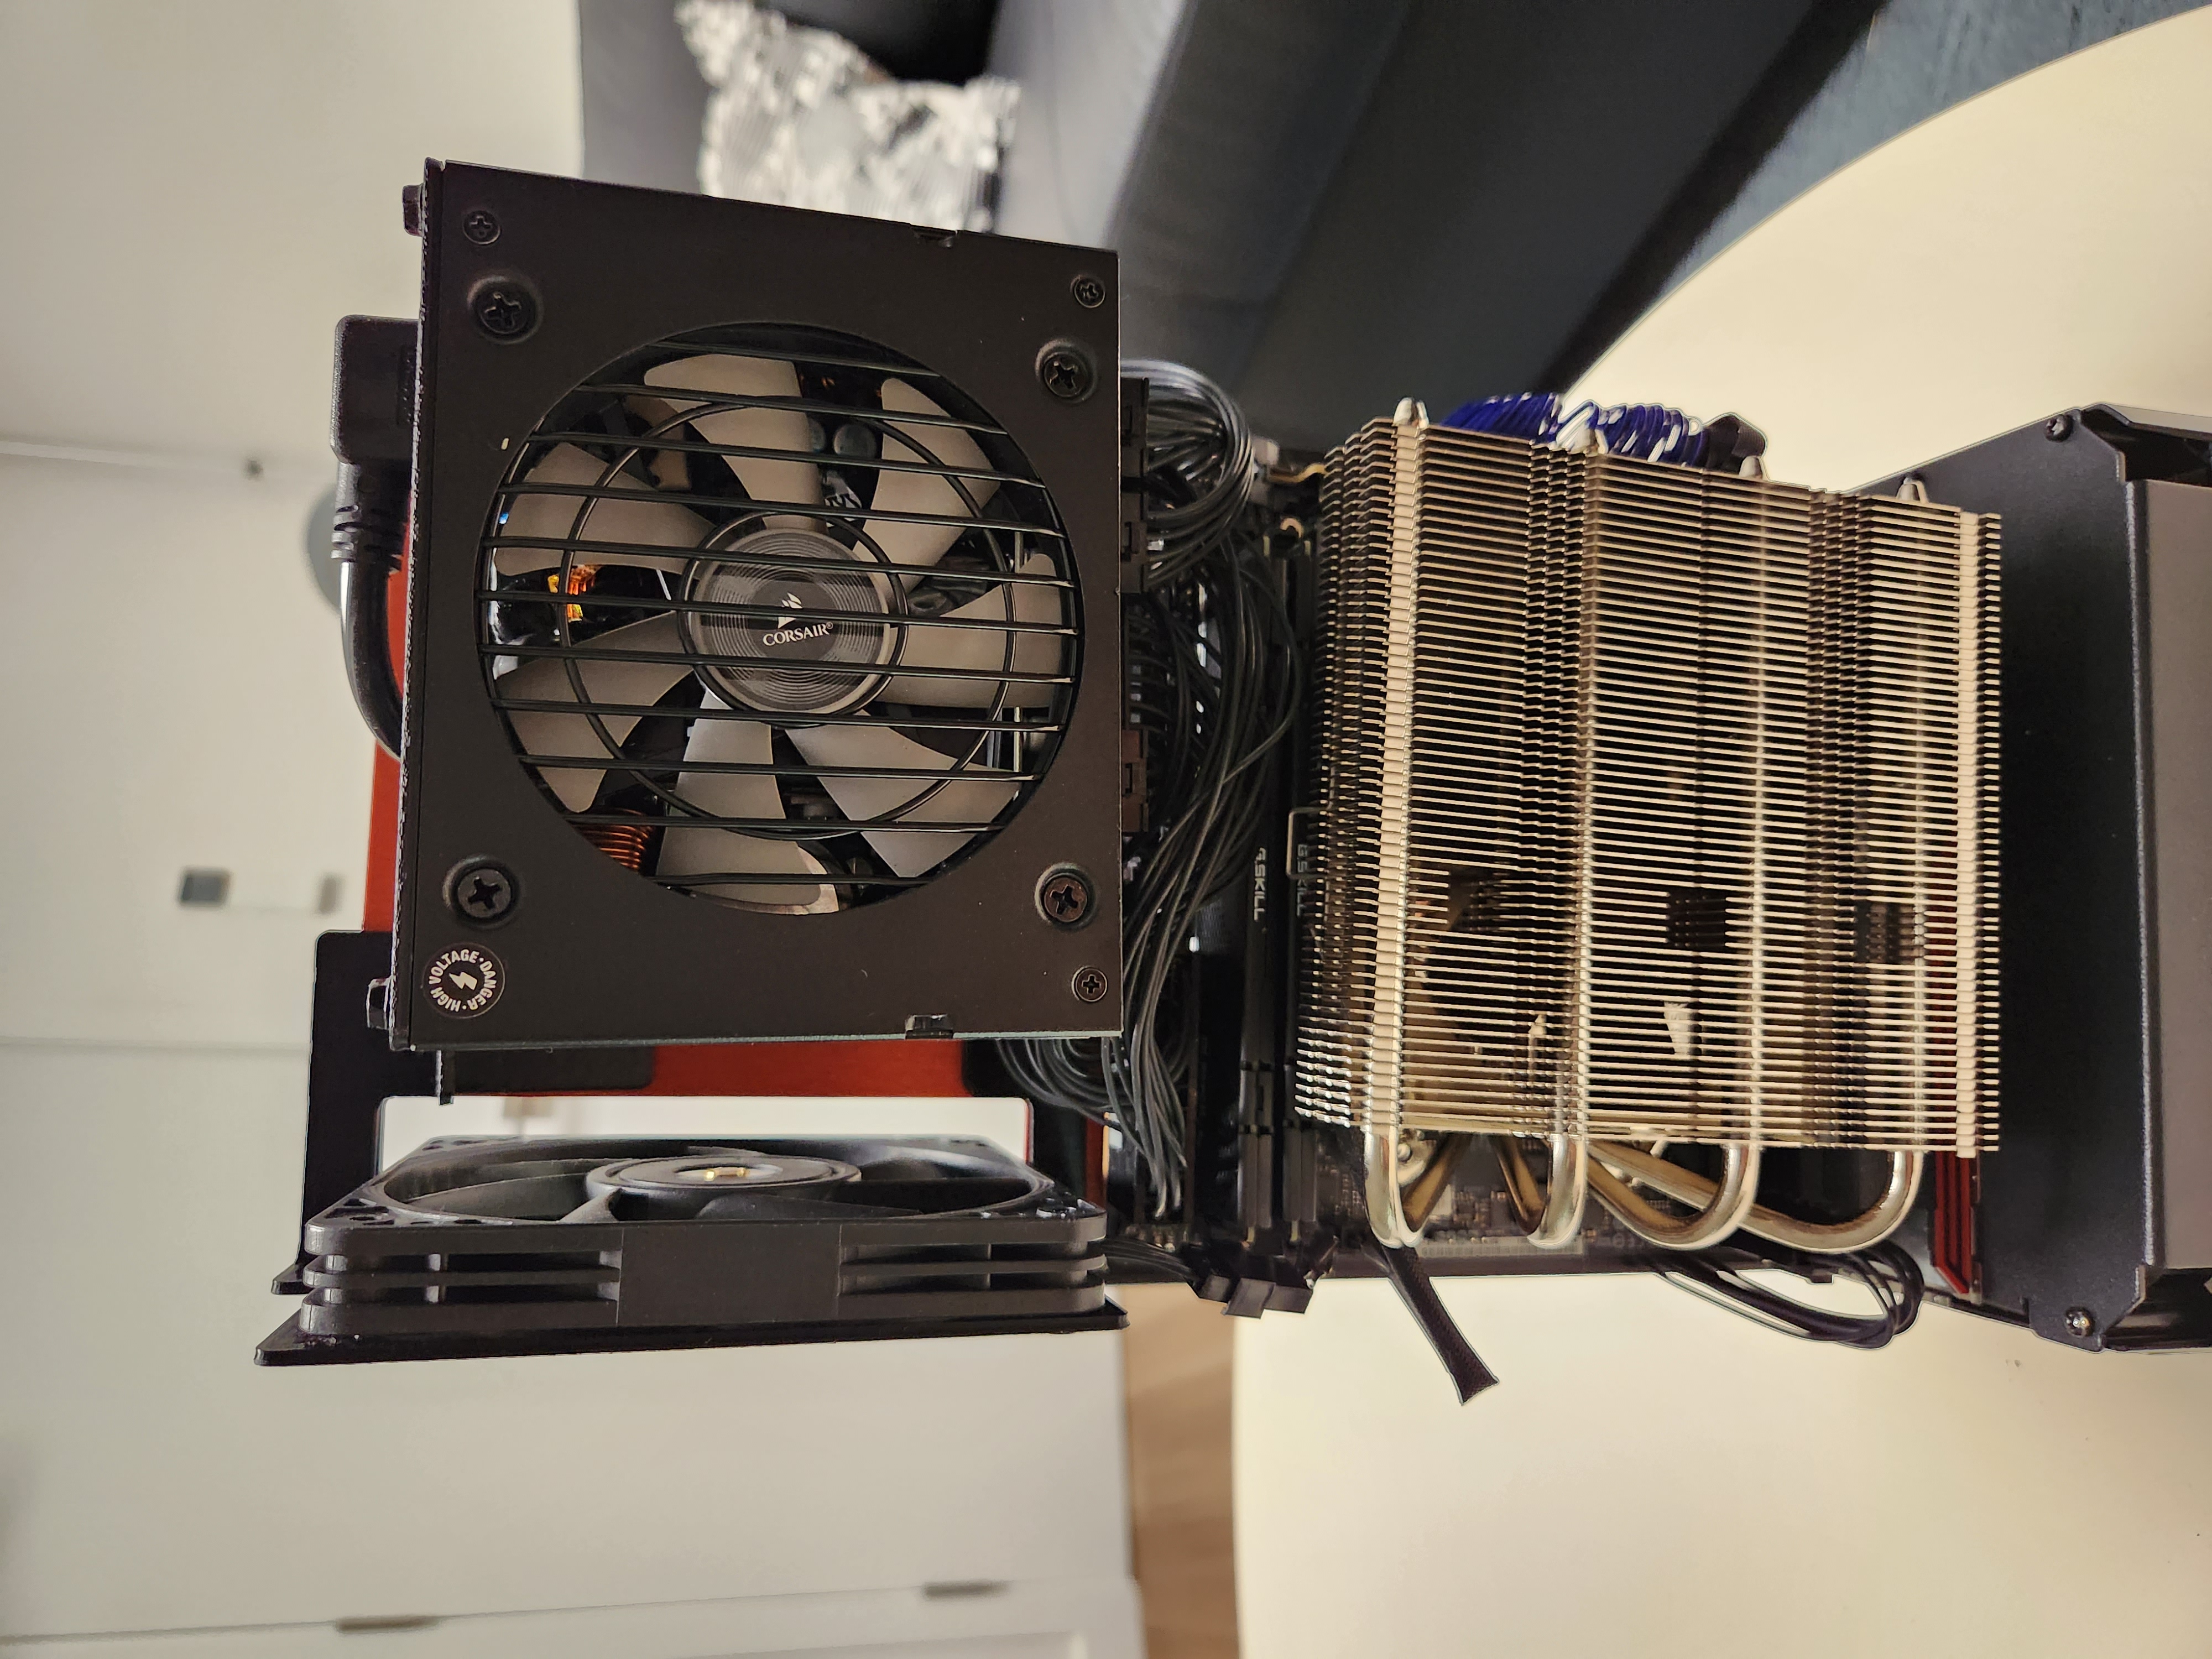
Louqe recommends using the Noctua NH-L12 Ghost Edition with an additional NF-A12x15 fan on top as the best cooler. I tried this, and while it does give very good cooling performance, it’s very difficult to get the shell to close. I take the shell on and off so much, it’s not a practical solution for me. The first thing I did was design and print a duct for the NH-L12 GE which you can see in the pictures above. The idea was to perfectly close the gap between the heatsink and the shell and let the stock fan underneath draw the air in from outside. This is what I used for the new bracket measurements above, and as you’ll see below, the performance wasn’t great. I also tried the Thermalright AXP120-X67, and the be quiet! Shadow Rock LP. I wanted to try the Scythe Big Shuriken 3 Rev. B as well, but couldn’t find one to purchase. For all of the tests, I used some 1/16" adhesive foam to seal the cooler fan to the shell for optimal air flow.
The results are below:
| Cooler | Fan | Fan Speed | CPU Clock | CPU Power | Cinebench |
|---|---|---|---|---|---|
| NH-L12 GE* | Stock + NF-A12x15 | 50% | 5.10 GHz | 105 W | 18987 |
| NH-L12 GE | Stock + Duct | 50% | 4.82 GHz | 92 W | 18085 |
| AXP120-X67 | NF-A12x25 | 50% | 4.78 GHz | 97 W | 18068 |
| AXP120-X67 | NF-A12x25 | 100% | 4.94 GHz | 110 W | 18621 |
| Shadow Rock LP | Stock | 50% | 4.68 GHz | 91 W | 17618 |
| Shadow Rock LP | Stock | 100% | 4.88 GHz | 106 W | 18448 |
| Shadow Rock LP | NF-A12x25 | 50% | 4.83 GHz | 100 W | 18121 |
| Shadow Rock LP | NF-A12x25 | 100% | 4.94 GHz | 112 W | 18632 |
Notes:
- *: old test result for baseline, without new brackets and custom cables
- New brackets and custom cables were used for these tests except as above
- CPU Temperature is pegged at 95C for all tests because of the Zen 4 thermal control
I mentioned that the testing isn’t rigorous, and this table shows why. At a given CPU power and CPU temperature, you should get about the same clock speed, and same Cinebench score. While I used the same thermal paste for all tests, the application, thickness, etc would be different, affecting the results. I also didn’t control for ambient temperature, though that shouldn’t vary enough to change the results significantly. Despite this, I think it is very reasonable to draw conclusions by comparing the CPU Power dissipated in each case, since Zen 4 pegs the temperature at 95C.
The winner here still appears to be the NH-L12 GE with the extra fan. If you compare the heatsinks, it’s not much of a surprise. It’s the biggest one, and with two fans, one directly sandwiched against the shell, you’ll get the most airflow. The ShadowRock LP is not far behind, though. With the NF-A12x25, it comes to within 5% of the NH-L12 GE. It’s also worth mentioning that the cooler is slightly shorter than the AXP120-X67, so I didn’t get as good a seal with my 1/16" adhesive foam. With slightly thicker form (or doubling up the 1/16"), I think I could’ve gotten an even better result. The AXP120-X67 is the smallest of the bunch, but is close in performance nonetheless.
Another contender is the new ID Cooling IS-67-XT. Based on this review, though, you might expect it to be similar to the AXP120-X67.
What Louqe should do for the RAW S2
If Louqe has enough pull to get a Ghost S1 Edition of the NH-L12, they should be able to get a RAW S2 Edition too. With further optimization, I think they could do even better than the Ghost Edition with two fans. It should be ~77mm tall with a 25mm fan on top, have fins under the entire cross section of the fan, with the fins as tall as possible while maintaining clearance for I/O and short RAM. I’m betting they could unlock a lot more performance out of the top end CPUs at reasonable noise levels.
GPU Ducts
The last testing I did was adding intake ducts to my GPU to see if I could get the temperature down with some cooler air. I’m planning on replacing it soon, so I went with very non-permanent and janky solution - looped pieces of paper taped together. I’m hoping with a 3 slot cooler, I can just use some foam to seal the gap. If not, I’ll 3D print something.
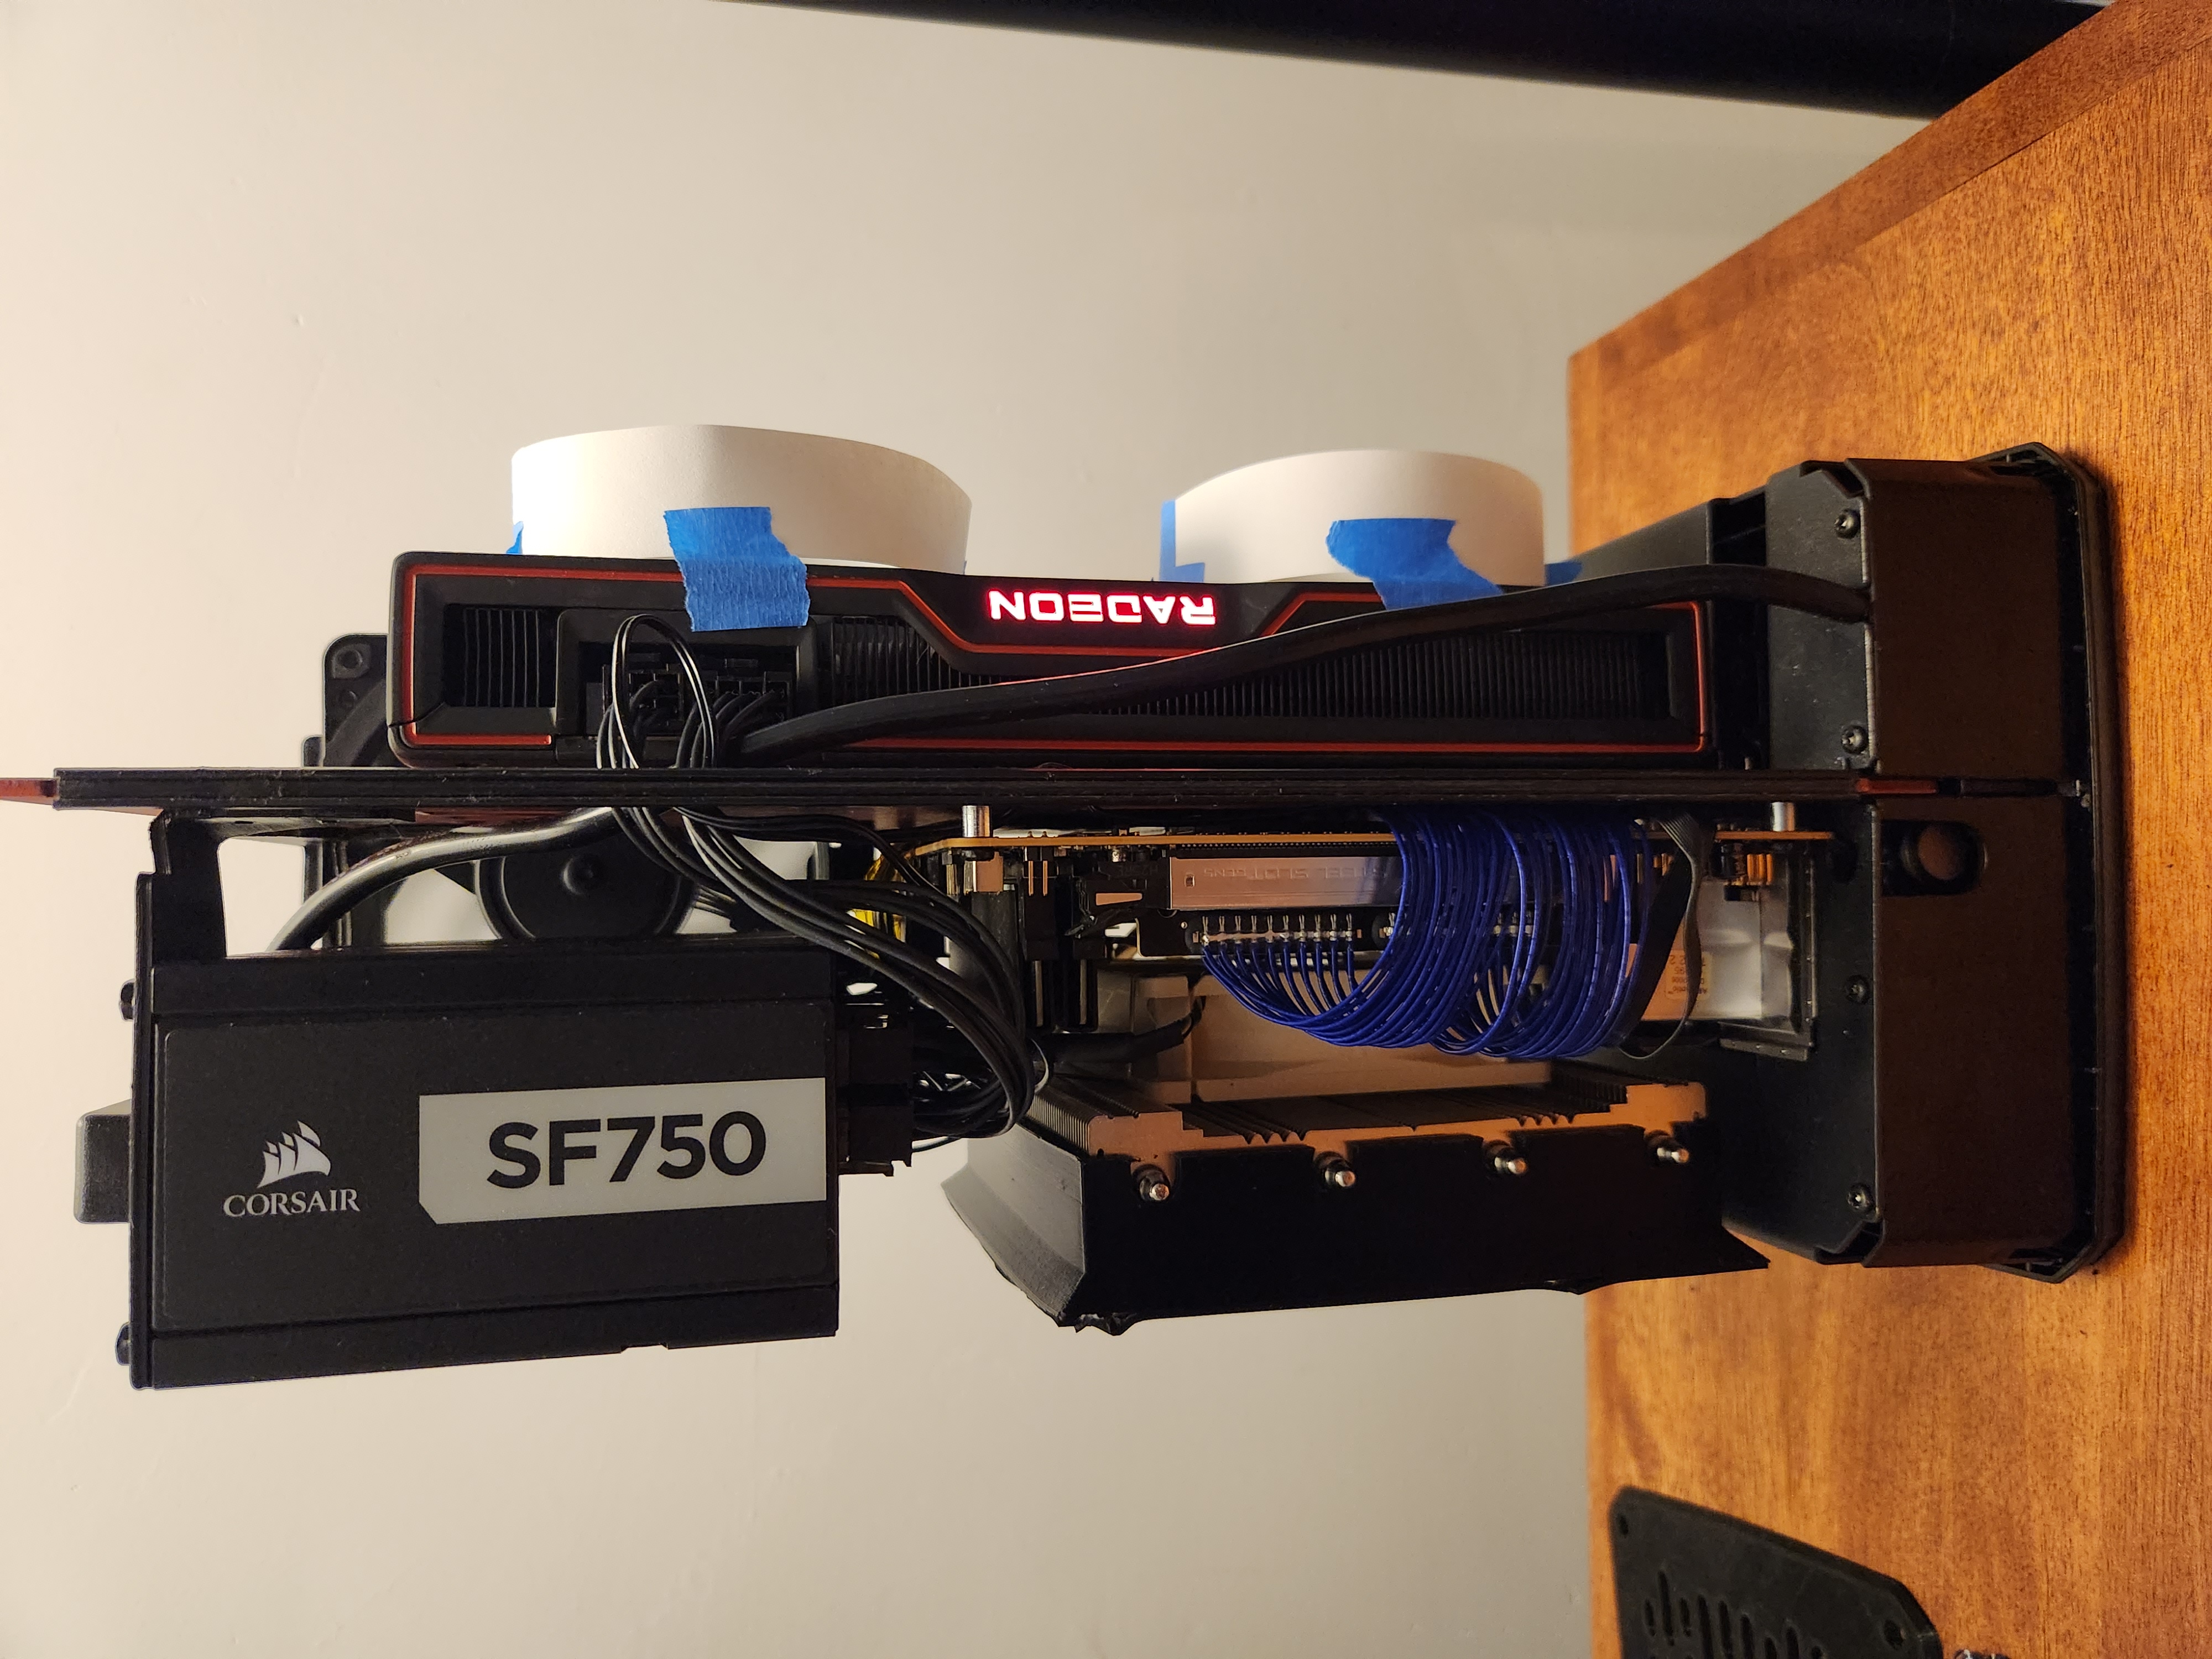
Poor man's temporary GPU intake ducts.
Some data:
| Test Condition | Exhaust Fan Size | Exhaust Fan Speed | GPU Temperature |
|---|---|---|---|
| Open Air | N/A | N/A | 74C |
| Open Air - One Sided | N/A | N/A | 81C |
| No Duct | 15mm | 50% | 89C |
| No Duct | 15mm | 100% | 88C |
| No Duct | 25mm | 50% | 88C |
| No Duct | 25mm | 100% | 87C |
| Duct | 15mm | 50% | 84C |
| Duct | 15mm | 100% | 84C |
| Duct | 25mm | 50% | 83C |
| Duct | 25mm | 100% | 83C |
With the duct, there was anywhere from a 4-5C drop in temperature, and more interestingly, there was little difference between fans and even the fan speed. Still, it’s quite a ways off from the best case of 74C in Open Air. I think with a better seal between the GPU, ducts, and the shell, I might’ve gotten another 1-2C drop. Out of curiosity, I taped off one side of the GPU heatsink (“Open Air - One Sided”) to see what would happen if I tried to force more of the hot air towards the exhaust fan and lower temperatures. Even in open air, it killed the performance of the heatsink. I didn’t bother testing it with the duct. Maybe I should have. There’s one more curious piece of information that helps lead me to my conclusion. While the GPU was running furmark, I used a meat thermometer to check the air temperature on the GPU side of the case at various points. It was 40C all around, the same temperature as the air coming out the exhaust. There were no hot spots! Which means that the exhaust fan can move enough air. So what gives?
With all this information, I believe the limiting factor here is the performance of the GPU fans under increased flow restriction. If you think about it, GPU cooling solutions are really designed for larger desktops, where they’re effectively in open air. The RAW S1 is small enough, and the openings in the side of the shell narrow enough that I think the GPU fans are under too much back pressure and can’t move enough air. A bigger GPU would help for two reasons: first, the coolers are bigger and fans more powerful, and second, three slot coolers mean the fans are already closer to the side of the shell. And based on community anecdotal evidence, these GPUs tend to perform well thermally. That being said, I checked with a friend who’s an aerodynamics engineer, and he told me that even if there are no hotspots, it’s possible that there’s just still not enough exhaust airflow, and the lack of air leaving the case could be causing the GPU fan to not be able to move air through the heatsink.
What Louqe should do for the RAW S2
This one’s a little tricky. If the issue is actually GPU cooler performance, there may not be a lot Louqe can do. But there are two things I think would help. The first is to move the screw used to hold the GPU in place one “slot” over, and include longer standoffs to push the slot further from the spine. It would also be nice to have a bumper to brace the opposite side of the GPU. The second is to change the size and potentially the layout of the openings in the shell. Certainly making the openings bigger would help everything. I also wonder if the pattern could be laid out such that it optimizes airflow. You’d probably have to do some kind of CFD simulation though, which may not be worth the effort.
Conclusion
As is usually the case, the thermal problems of the Loque RAW S1 are caused by airflow problems. The lack of any real intake and extremely restricted exhaust mean that there is not enough cold air coming in and hot air going out. Using a good CPU cooler with the right fan and possibly adhesive foam can help with the intake on the CPU side. Moving the GPU closer to the shell or adding some ducts can help intake for the GPU. And finally, using the new brackets I designed can yield nearly 3X improvement in exhaust airflow. Fortunately, there’s also a lot Louqe could do to make improvements in the next generation that would eliminate the need for customers to use so many mods. (P.S. hey Louqe - if you need a thermal design consultant, my rates are very reasonable 😉)